Welcome to the first installment of our VyHub Setup Guide series. In this blog, we will walk you through the process of creating your VyHub account and setting up your gaming website in under 5 minutes. If you are here, you’ve already taken the first step toward unleashing the full potential of the VyHub platform. Whether you’re looking to craft a stunning website for your gaming community, monetize your game server with our integrated shop, or harness our powerful management tools, you’ve made a wise choice with VyHub.
Creating Your VyHub Account
Let’s dive right in. Your journey begins with the creation of a VyHub account. Just click “Login” in the top-right corner, and then select the “Register” tab. Choose a username that suits you, and request an email confirmation code. Once you’ve filled in all the necessary information, you’re good to go, and you’ll be redirected to your dashboard.
Navigating the VyHub Dashboard
The dashboard is your command center, where you have total control over all your VyHub instances. Do you need to change your domain, activate an add-on like our integrated forum, or handle your VyHub fees? It’s all at your fingertips within the dashboard.
Creating Your First VyHub Instance
Now, it’s time to create your first VyHub instance. Here are the steps to follow:
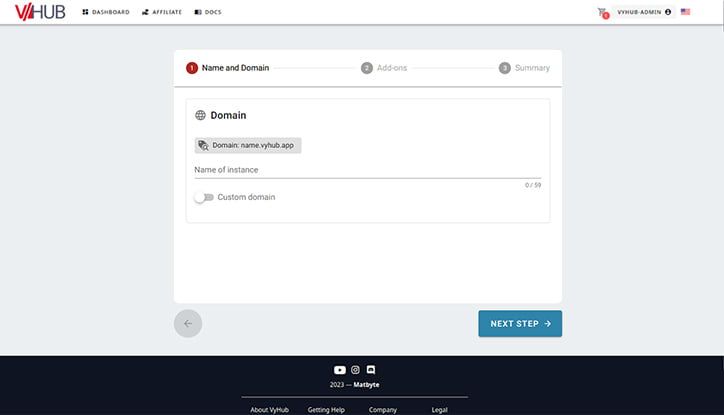
- Click the prominent green “Create Instance” button.
- Start by selecting a catchy name for your instance. By default, your VyHub instance will be accessible at the address depending on your chosen instance name ({instance-name}.vyhub.app). You can simply use your community’s name. In the same step, you can also set a custom domain, allowing you to personalize the web address for your instance.
- When configuring a custom domain, you’ll need to set up a CNAME DNS record. Don’t worry; we’ll cover this in more detail in a future blog post. Remember that all these settings can be modified later on.
- In the next step, you can add available add-ons to your VyHub instance. These add-ons are typically paid and can include features like a forum system. You can always activate or deactivate add-ons at a later time. The final step is a confirmation of your choices. Simply click “Confirm,” and your new website will be deployed in the background. Follow the link to your dashboard, and you’ll find all the details of your instance parameters. Now, it’s just a matter of waiting, as the setup process may take up to 5 minutes.
What’s Next? – How to Connect a Game Server to Your Website
In one of our upcoming blog posts, we’ll explain how to connect a game server to your new website. This connection opens up a world of possibilities, allowing you to track playtime, enforce server rules with bans and warnings, and even automatically sell in-game items for real money. Stay tuned for more insights and guidance on maximizing your VyHub experience.
By following these steps, you’ll have your VyHub account and instance up and running in no time, ready to power your gaming community’s online presence. So, let’s get started on your VyHub journey!
Also, be sure to check out our YouTube channel. There, you will find many videos explaining various topics related to game server hosting and the features that VyHub offers.